Customized Linux distribution and a safe systems programming language sounds like a very interesting combination for embedded development. That is what makes Yocto and Rust such a good match. So, I wanted to see how Rust projects could be cross-compiled with Yocto-generated toolchain and root filesystem. The steps are described in this post.
Yocto Project
Yocto Project is a system building toolset that allows to configure and build complete Linux distributions completely from source code, including the cross-compilation toolchain. Bootloaders, Linux kernel, drivers, libraries and utilities can all be built with Yocto. It is also able to generate bootable system images and SDK packages.
The main benefits of using Yocto based Linux when compared to other more generic distributions (such as Ubuntu) are lightness, customization possibilities and the ability to easily export SDK for application development. It gives a solid foundation for an embedded device because the developer has full control over all software versions, configurations and how the system is built.
Rust
Introduction in The Rust Programming Language book summarizes Rust as follows:
The Rust programming language helps you write faster, more reliable software. High-level ergonomics and low-level control are often at odds in programming language design; Rust challenges that conflict. Through balancing powerful technical capacity and a great developer experience, Rust gives you the option to control low-level details (such as memory usage) without all the hassle traditionally associated with such control.
In a previous post “My experiences learning Rust” I have written about my first experiences with Rust, and also highlighted some of the main selling points of Rust. Shortly, Rust has a strong focus on safety, performance and concurrency and it is also well suited for embedded development where C and C++ are predominantly used.
Building a core image with Yocto
Before going into to cross-compiling Rust, I will cover the main steps to build Yocto Linux for an embedded board. Though, the main focus is not to be a Yocto tutorial so I will only cover basic core image and SDK without customizations. If you are already familiar with Yocto, you might want to skim through or skip directly to next chapter. On the other hand, if you want more details, you can refer to the Yocto Development Manual.
In these instructions, Raspberry Pi 1 is used (because I had one lying around). The main steps are more or less the same for other platforms.
In Yocto, the configuration is constructed using layers, and usually the base layers come from Poky (which is the reference distribution of Yocto Project). Hardware support layer, meta-raspberrypi in this case, is added on top of the base layers. Additional project specific layers can also be added. Each layer can add new, modify or append the configurations and recipes (build instructions) of previous layers to construct the final setup.
To get started, Yocto host dependencies need to be installed to the build machine. These dependencies are defined in Yocto Reference Manual. Install the packages listed in Essentials section.
Then, Poky and meta-raspberrypi repositories are cloned. Note that same version branch is used from both repositories. Additionally, the basic Raspberry Pi image requires meta-openembedded layer so that is cloned too
git clone -b rocko git://git.yoctoproject.org/poky.git
cd poky
git clone -b rocko git://git.yoctoproject.org/meta-raspberrypi
git clone -b rocko git://git.openembedded.org/meta-openembed
Next, environment setup script that was cloned with Poky is sourced. This will set up build directory with default configuration.
. ./oe-init-build-env
Then the layers are added to layer configuration in poky/build/conf/layers.conf. Add the following layers to BBLAYERS variable.
BBLAYERS ?= " \
 /home/devel/rpi/poky/meta \
 /home/devel/rpi/poky/meta-poky \
 /home/devel/rpi/poky/meta-yocto-bsp \
 /home/devel/rpi/poky/meta-raspberrypi \
 /home/devel/rpi/poky/meta-openembedded/meta-oe \
 /home/devel/rpi/poky/meta-openembedded/meta-multimedia \
 /home/devel/rpi/poky/meta-openembedded/meta-networking \
 /home/devel/rpi/poky/meta-openembedded/meta-python \
"
Finally, the target machine is set to poky/build/conf/local.conf. Change the default qemux86 target to raspberrypi (or to the board you are building for). Other Raspberry Pi variant names are found from meta-raspberrypi/conf/machine.
MACHINE ??= "raspberrypi"
Now, the system image can be built. If you open a new shell, remember to source the oe-init-build-env script before build.
bitbake rpi-basic-image
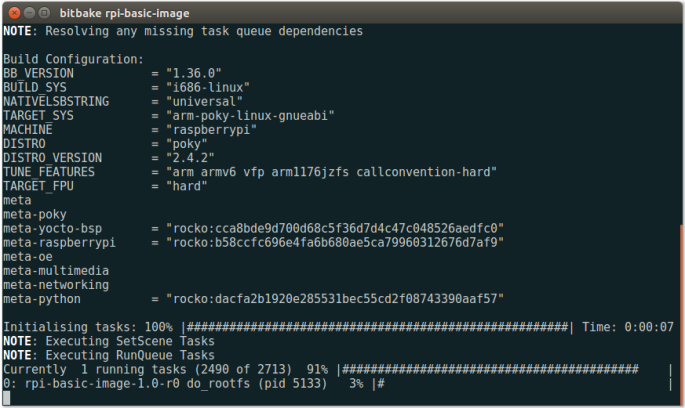
When the build starts, you should see the correct target machine as well as layers.

Now is a good moment to grab a cup of coffee (a big one) or take a break. Bitbake builds the system starting from host tools and cross-toolchain which takes quite a while. Usually several hours depending on the host machine.
When the build is finished, SD-card image is found from deploy directory. The actual output image depends on the target board.
poky/build/tmp/deploy/images/raspberrypi/rpi-basic-image-raspberrypi.rpi-sdimg
Yocto generated toolchain and sysroot can be used for application development, including cross-compilation of Rust binaries. Yocto provides an easy way to export SDK package which matches the root filesystem that was previously built.
bitbake -c populate_sdk rpi-basic-image
This will create an SDK installer that contains the cross-toolchain and rpi-basic-image sysroot for linking. The SDK can be installed to other machines without the need to run the lengthy Yocto build. The SDK installer is found from the deploy directory.
If you don’t need to set up application development environment to other machines, you can also bitbake meta-ide-support to use the toolchain and sysroot directly from Yocto work directories. This will generate, among other things, an environment setup script to easily access the Yocto toolchain (similar script is also available in the SDK install directory).
Cross-compiling Rust with Yocto toolchain
Now that the Yocto image is built and development tools are available, Rust cross-compilation setup can be configured. I expected it to be difficult, but after a bit of research I was pleasantly surprised how simple it actually was.
First of all, to be able to run Rust binaries on the target hardware, core and std crates are needed for that platform (it is also possible to write no-std code, but std is usually used with Linux). Pre-compiled binaries are available for many common architectures. Check the supported platforms here. Raspberry Pi 1 has ARMv6 CPU so the correct target is arm-unknown-linux-gnueabihf (Yocto image was built with TARGET_FPU = "hard" so the hf variant is used).
The binaries are installed using rustup.
rustup target add arm-unknown-linux-gnueabihf
At the time of writing, many of the supported platforms (including ARM) have Tier 2 support which means that these targets are not automatically tested. I did not encounter any problems but this is something to keep in mind for production use. If binaries are not available, they can also be compiled using xargo tool.
Next, linker configuration is added for the target platform. Rust uses LLVM for compilation, but linker is used from the Yocto toolchain. This way Rust binaries can be linked with system libraries in the target root filesystem. Take a look at the environment setup script that is found from build/tmp/deploy if meta-ide-support was used or in the SDK install directory if SDK was used. For instance, environment-setup-arm1176jzfshf-vfp-poky-linux-gnueabi. The exact file name depends on the target board.
The environment script sets PATH to Yocto generated tools and also provides environment variables for compiler, sysroot and compiler flags. See the CC variable:
export CC="arm-poky-linux-gnueabi-gcc -march=armv6 -mfpu=vfp -mfloat-abi=hard -mtune=arm1176jzf-s -mfpu=vfp --sysroot=$SDKTARGETSYSROOT"
This variable provides GCC command with correct flags for cross-compilation and linking. Same compiler and flags are also configured for Rust. Open or create ~/.cargo/config file and add configuration for the target that was installed earlier with rustup.
[target.arm-unknown-linux-gnueabihf]
linker="arm-poky-linux-gnueabi-gcc"
rustflags = [
"-C", "link-arg=-march=armv6",
"-C", "link-arg=-mfpu=vfp",

"-C", "link-arg=-mfloat-abi=hard",
"-C", "link-arg=-mtune=arm1176jzf-s",
"-C", "link-arg=-mfpu=vfp",
"-C", "link-arg=--sysroot=/home/devel/rpi/poky/build/tmp/work/arm1176jzfshf-vfp-poky-linux-gnueabi/meta-ide-support/1.0-r3/recipe-sysroot",
]
Linker is set to arm-poky-linux-gnueabi-gcc and the flags are same as in the environment setup script. Note that $SDKTARGETSYSROOT variable has been expanded.
That’s it! Only one configuration file was needed on the Rust side.
One thing to note though. The Yocto environment script overwrites the default $PATH variable which means that cargo and the system linker cc are not directly available. The system linker is required for some crates even when cross-compiling. Easiest way to sidestep this problem is to add :$PATH at the end of export PATH= line in the environment script. This way the Yocto paths prepend the system paths instead of overwriting them.
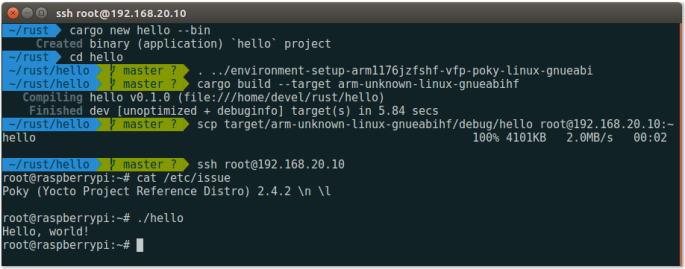
Now, simply source the Yocto environment script and use --target arm-unknown-linux-gnueabihf argument with cargo.

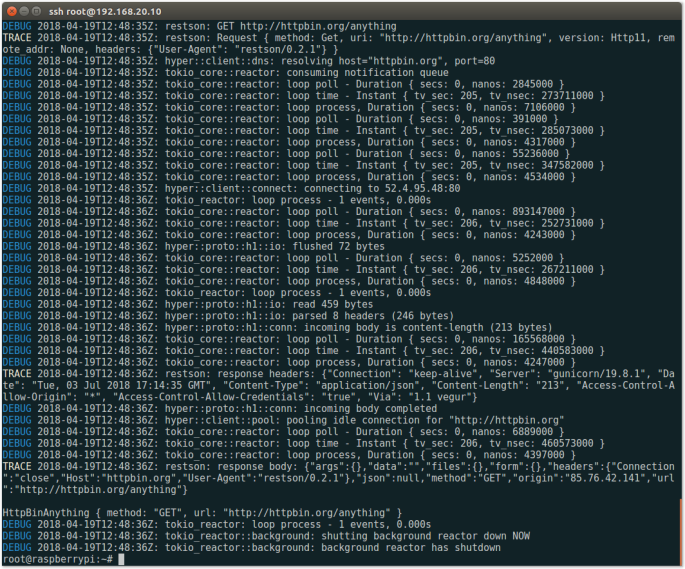
I also tried a less trivial example by cross-compiling a REST client (using Restson crate) with OpenSSL.

Only additional configurations were OPENSSL_DIR and PKG_CONFIG_ALLOW_CROSS environment variables that had to be set for openssl crate (which was helpfully mentioned in the build error message). Other than that everything worked right out of the box.
meta-rust
There is also an OpenEmbedded layer meta-rust that provides integration between OpenEmbedded build systems, including Yocto, and Rust tools. This layer contains configurations to build Rust packages with bitbake which can then be included in the core images. Additionally, cargo bitbake subcommand can be used to generate template recipes from Rust projects. These projects can be useful when adding Rust packages to Yocto layers.
Conclusions
Overall, setting up the cross-compilation configuration for Rust was simple and after a bit of research everything worked as expected. Yocto generated environment script was used to easily access the toolchain and sysroot which were then added to cargo configuration. Cargo is invoked with matching target argument and it then uses the Yocto toolchain for linking. Once again, Rust delivers.
This is a really useful post. A neat extension is to wrap the build in a subshell script and put that somewhere in your path (I use ~/bin):
“`
#!/bin/bash
FILE=/opt/poky/3.0.2/environment-setup-cortexa9hf-neon-poky-linux-gnueabi
if test -f “$FILE”; then
(
. $FILE
cargo build –target=armv7-unknown-linux-gnueabihf $@
)
fi
“`
`FILE` and `–target` should be set appropriately.
LikeLike